Having forms on your website is great for so many reasons! Whether you are wanting to let people get in contact with you, get a sign up to a newsletter, or gather information for a unique service you provide. Gravity Forms is our preferred plugin to help you achieve this on your WordPress site.
After the initial build of your website, there may be small changes and adjustments you want to make to these forms. This article covers some of the basic changes that are always handy to know when it comes to your Gravity Forms.
Forms
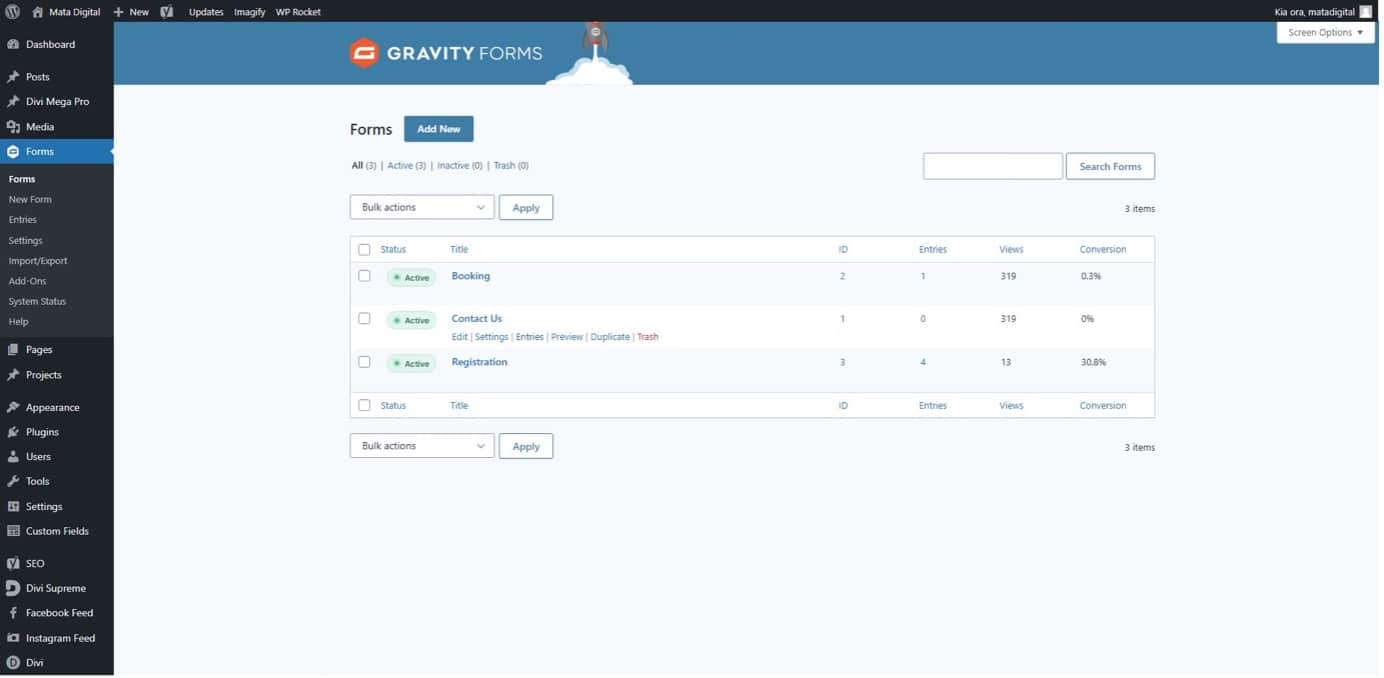
The Forms tab navigates to the Gravity Forms plugin. This plugin is used for contact forms
or any other forms that may be on your website. From the Gravity Forms tab, forms can be selected and updated as required. Though many websites with simple contact forms will not need to update their forms at all.
Editing a Form
Select the form you wish to edit – this will open up the selected form.
Change the field label in the tab on the right or adjust the *required rule for this input. Click “Save Form”.
If you have larger, more complicated forms on your website, you may have conditional logic active. In this case, it’s best to avoid making too many changes to your form such as adding new fields because this can interfere with the conditional logic. Not sure if conditional logic is active on your form? Click on the fields and refer to the bottom of the tab on the right, if the “Conditional Logic” section is green and “active” then this field has conditional logic applied, if it is grey and “inactive” on ALL fields within the form then your form does not contain any conditional logic.
Changing a Form Notification
Email notifications are sent out when a new form entry has been submitted. It is possible to change the email that receives these notifications when needed.
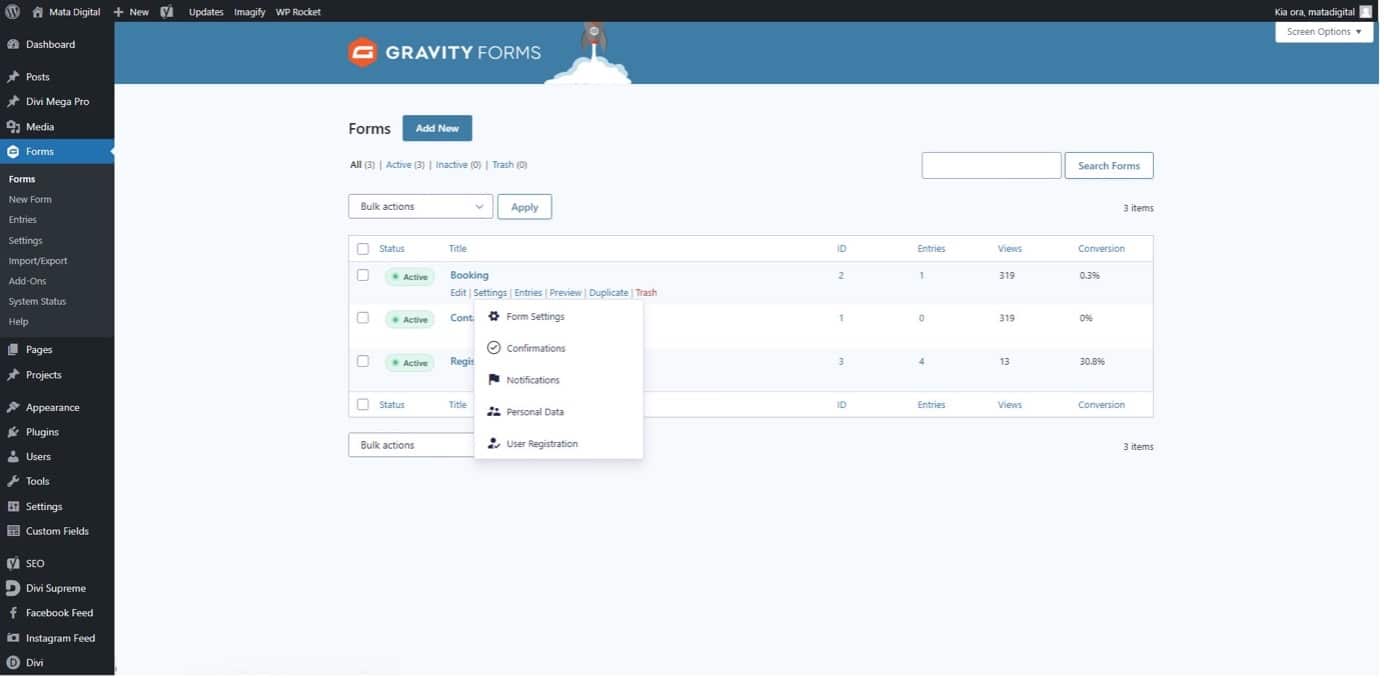
Hover over the form you would like to adjust – this will bring up some additional options. Select “Notifications” – this will open up a page with a list of notifications.
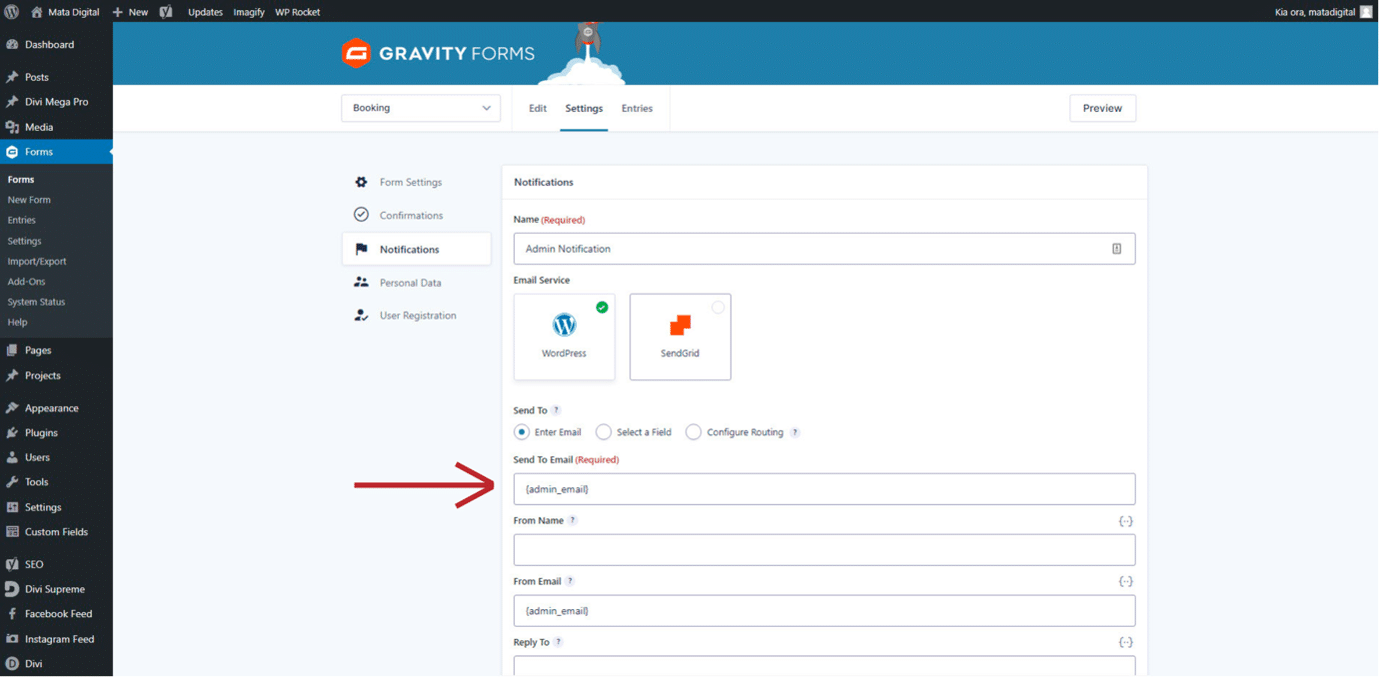
Select “Admin Notification” from the list- this will open up the settings for this notification. Find the “Send to Email” field.
Enter the required email.
Click the “Update Notification” button at the bottom of the page to save your changes.
Creating a New Form
You may need to add a new form to your website at some point. This can be done easily with the Gravity Forms plugin.
Click the “Add New” button in the Gravity Forms tab to create a new form.
A popup box will appear with an input field for the Form Title and Form Description. Fill out these fields and select the “Create Form” button.
Add the fields you would like to include in your form following the same process as you would when editing a form, ensuring that you tick the required box on any required fields.
Set any necessary conditional logic by selecting the desired field and navigating to the conditional logic tab. Turn on the enable conditional logic toggle. Set the field to either “Show” or “Hide” if “All” or “Any” of the conditions you create match. Set your conditions by selecting a form field from the dropbox box. Next, set the condition and the value.
Click the “Save Form” button.
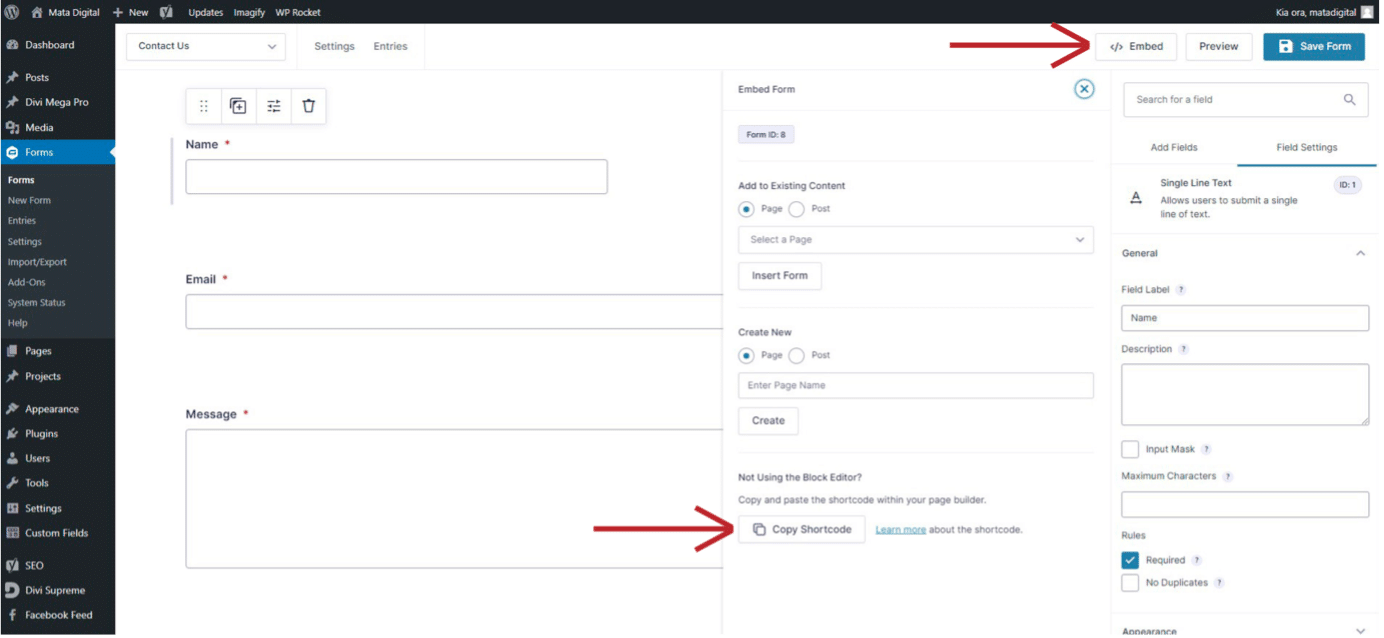
To add your form to a page on your website you need to embed the gravity forms code. Select the Embed option in the top left of the form editing screen.
Click the “Copy Shortcode” button.
Go to the pages tab in the dashboard.
Select the page that you would like to add your new form to.
Click the blue “build on the front-end” button to open the Divi builder.
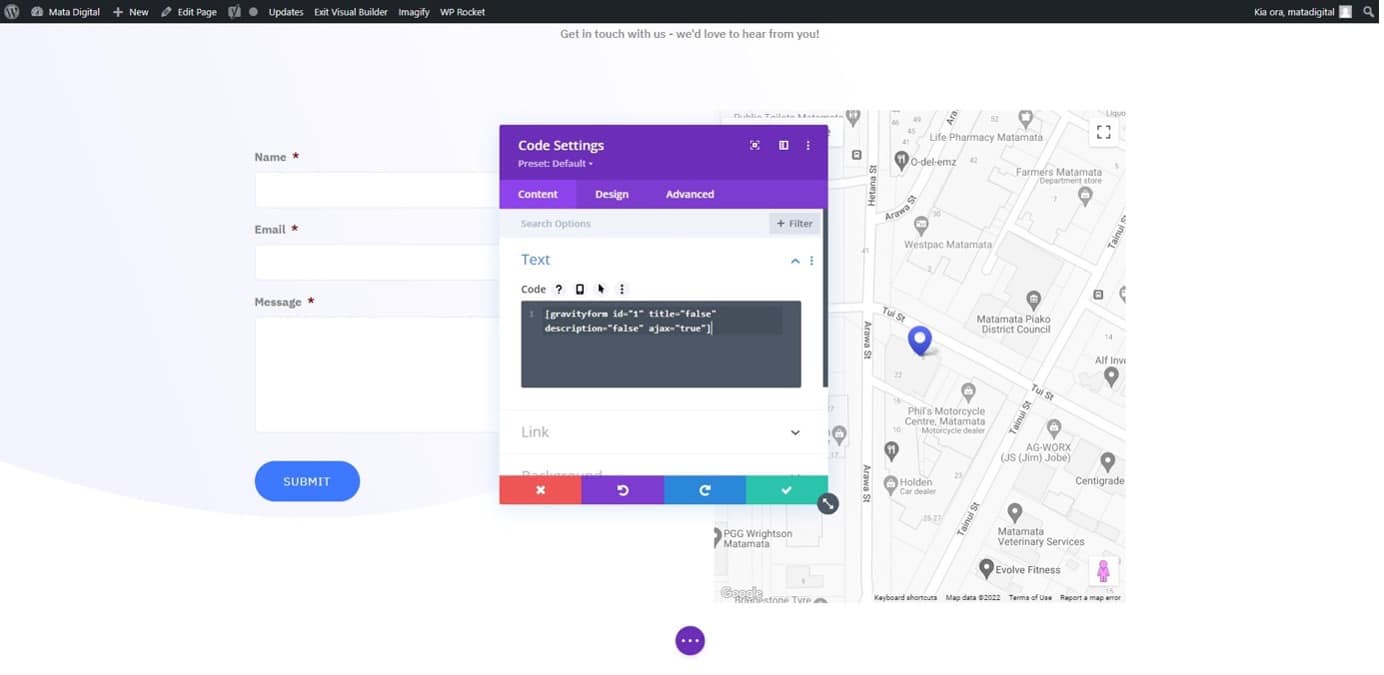
Within the section that you would like to add your form to, select the grey plus to add a new module for the form.
Select the code module to create a module for code.
Paste the shortcode you copied into the code box within the popup box. Select the green tick to apply your changes.
Save your changes by selecting the three dots in the purple circle at the bottom of the page then click the green “Save” button.
Ensure you set up the notification for this form. To do this, follow the instructions on “Changing a Form Notification”.
Viewing Form Entries
Gravity Forms stores all entries to forms on your website. Form entries can be viewed from the back-end of your website from the forms tab.
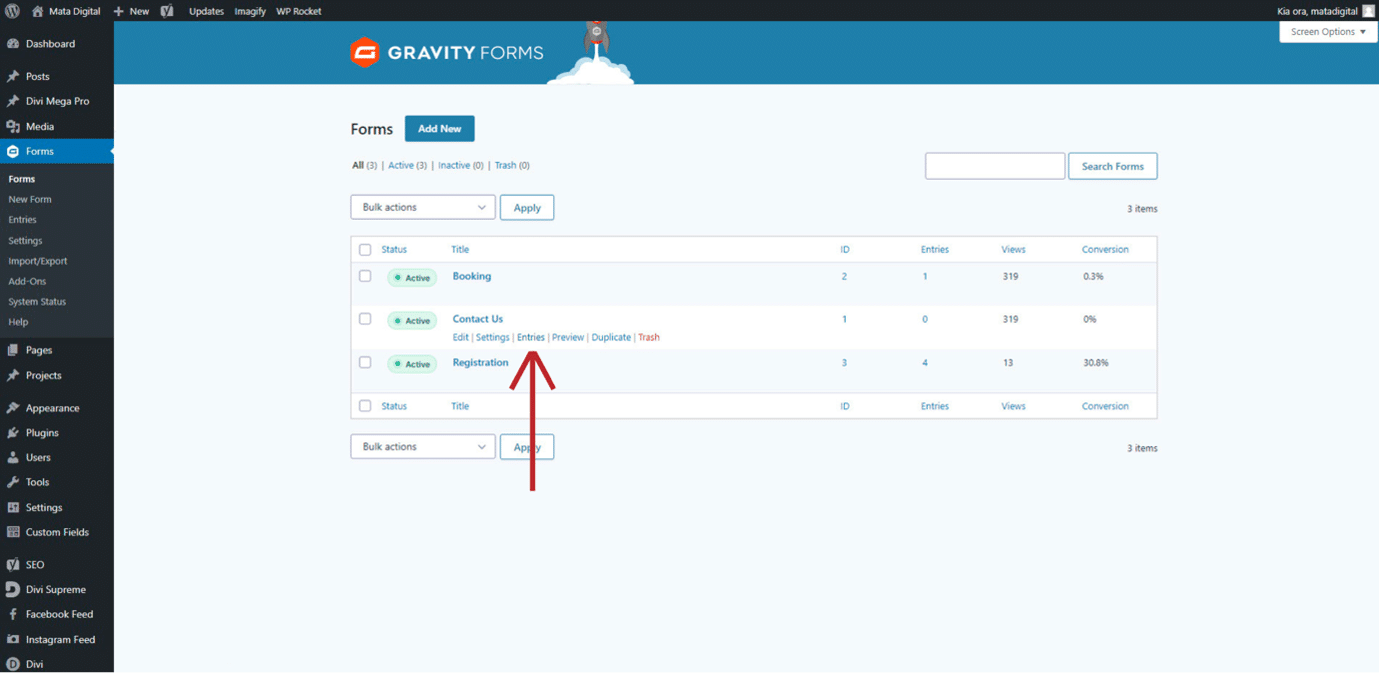
Hover over the form you would like to view – this will bring up some additional options
Select the “Entries” option – this will open a list of all form entries.
To view a full entry hover over the form – this will bring up some additional options again . Select “View”.
Now you can go through your WordPress site with more confidence to make basic website changes. This guide is only meant for simple updates, changes, and maintenance of your site, some websites require more complex and specialised training.
If you are in need of some website training or need more complex changes to your website then get in touch with us here at Mata Digital today. Anything website related can be fulfilled by the team at Mata Digital, we are happy to help.
For assistance reach out to [email protected] or call us on 0800 00 27 86

